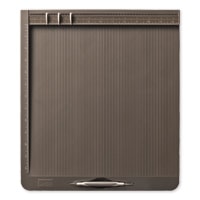
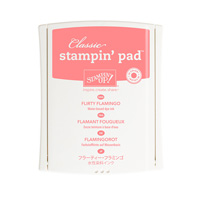
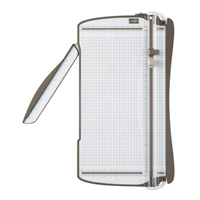
Thursday, 4 August 2016

Pootlers Design Team - August - Week 1

Hello and welcome to my fabulous opportunity - and privilege - to be part of the Pootles Design Team for August!
Each month, 4 or 5 of us 'Pootlers' who are in the gorgeous Sam Hammond's Stampin' Up! team are challenged to come up with a design each week from one stamp set.
You can see other projects for this month and previous months (and, of course, visit again in future months!) at www.pootles.co.uk

Our stamp set for August is 'Lovely Stitching'.

My project for Week 1 is a set of 3x3 note cards in the new 2016-2018 In-Colours: Peekaboo Peach; Emerald Envy; Flirty Flamingo; Dapper Denim and Sweet Sugarplum.
I've also made envelopes to match in the same colours using the 2016-2018 In-Colour Envelope Paper.


I've done a pictorial step-by-step tutorial on how to make these, so I hope you enjoy and will have a go at making them. I really enjoyed making them and I'm really pleased with the end result - I'm delighted that the idea managed to get from my head to my craft table!

So without further ado, let's get on with the pictures!


First, cut 5 pieces of thick white cardstock measuring 3" x 6"


Then score each piece of card at 3"


Fold and burnish along the score line on each to make a card measuring 3" x 3"


You now have 5 card bases 


Then cut one piece of cardstock in each of the 5 in-colours measuring 2-3/4" square


Then cut 5 pieces of white cardstock measuring 2-1/2" square and stipple with each of the 5 in-colour inks using a sponge (I use the Stampin' Up! sponges cut into quarters


 Stick each stippled piece on to your co-ordinating cardstock squares 


 Then get ready with your chosen stamp set - for this project it's the 'Lovely Stitching' set .....


 ..... and stamp your chosen design(s) in each of the 5 in-colours on scrap pieces of white cardstock


 I then cut mine out using the 1-3/4" circle punch


 and sponged round the edges using the relevant colour


I then added a large basic pearl to the centre of each flower to add a bit of bling!


 Add dimensionals to the back of each punched flower


and stick to the centre of your card front
Peekaboo Peach


 Dapper Denim


 Flirty Flamingo


 Emerald Envy


 Sweet Sugarplum


Make matching envelopes in the co-ordinating 2016-2018 In-Colours Envelope Paper using the Envelope Punch Board
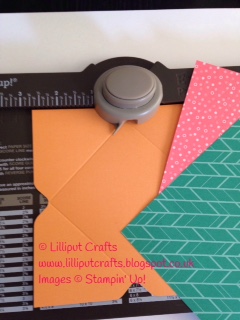

Decorate as you wish (or not) with the co-ordinating ink - these are stamped in the same colour as the envelope (Emerald Envy ink on Emerald Envy paper and so on)


 Little Miss Flirty Flamingo card peeking out of her envelope ....


 ..... and hiding inside her envelope to let you see the double-sided tape for sealing the envelope ready to post


 And finally, all 5 cards complete!


Thanks to Stampin' Up!'s 'Fruit Stand' DSP for providing the backdrop for the photos!


I hope you've enjoyed this project and I hope you'll have fun making your own. I'd love to see your creations, so please feel free to post pictures in the comments below.

Hope to see you again next Thursday for week 2!

'Bye for now!
Karen

Product List

Monday, 1 August 2016

Inchy Blog!

Good morning!
Today I'm taking part in a fun 'inchy' blog - where everything has to be on a base that measures only one inch square!
Here's the link to the blog: inchybyinch.blogspot.co.uk which is co-ordinated by the lovely Fiona Whitehead from Crafty Stamping.
This time the theme is butterflies.

The base for this butterfly is 1" square, cut from Stampin' Up!'s Sweet Sugarplum cardstock with the white mat measuring just 7/8" square and mounte using a Dimensional foam pad..
The butterfly is punched from Stampin' Up! envelope paper in Sweet Sugarplum with some Wink of Stella added to her spots to make them sparkle - you can just catch it in the first photo.
Three tiny pearls make up her body in the middle.


Watch out for the next inchy challenge soon!

Sunday, 31 July 2016

Simple Sundays

Back with another 'Simple Sundays' project!
Apologies for the delay since the last one!

This week I have another simple project for you ...... DIY DSP!
Yes, Do-It-Yourself Designer Series Paper!

This was a challenge set to our extended team, The Pootlers, by our lovely upline, Sam Hammond, a few weeks ago.
My design came from grabbing a stamp set and a few inks and seeing what I could come up with. The possibilities are endless!

I used a piece of A4 Whisper White cardstock and the stamp set is 'Swirly Bird'.
The inks I used are all the 2016-2018 In-Colours - Sweet Sugarplum, Emerald Envy. Flirty Flamingo. Dapper Denim and Peekaboo Peach:


Have a go yourself - see what you can create using a selection of stamp sets and inks. You can plan it or you can choose at random, it's your choice.

Happy stamping!


Product List

Saturday, 23 July 2016

Simply Sketched Saturday Challenge #12


Hello again!
Thank you for joining us for another Simply Sketched Saturday Challenge! We’re so excited to be sharing this hop with you.  The products used are all available in the current Annual, or seasonal, Stampin’ Up!® Catalogues.  Simply use the buttons at the bottom of the post to keep hopping!

This month's challenge was designed by the lovely Louise Thomas from White Flag Designs. Here it is:


It was a design which immediately told me what it would be ......... a front cover decoration on a notebook!

So here's my notebook (which I already have notes in!):


It's an inexpensive kraft notebook bought from a local chain store.
The cardstock mat is Peekaboo Peach taken from the 'Fruit Stand' cardstock pack.
I then added the strip of DSP, taken from the 'Fruit Stand' DSP pack.
The cardstock with the stamped sentiment and the circle on which the flower is mounted are both Watermelon Wonder, again from the 'Fruit Stand' cardstock pack.
The sentiment is chosen from the 'Grateful Bunch' photopolymer stamp set and stamped using Melon Mambo ink, with the stamped flowers also being from this stamp set, stamped using Peekaboo Peach ink.
I used Dimensionals to raise the stamped sentiment up slightly.
I punched the flowers using the 'Blossom Bunch' punch and layered them using Tombow Multipurpose Liquid Glue glue to let me move them around into the correct position. I also used Tombow to attach them to the cardstock circle, which I punched using the 1-3/4" circle punch.
I curled the edges of the flowers slightly using my bone folder.
The centre of the DSP flowers are accentuated using Basic Rhinestones to add a wee bit of bling!

As I usually do, I stuck to the design pretty much to the letter and I'm really pleased with the end result.
I also felt a bit self-indulgent using that particular sentiment, but I guess I'm allowed to tell myself that I'm awesome sometimes!

I hope you like it and I know you'll be keen to get on to the next blog in this hop, so I'll say goodbye for now and let you continue on your journey - just click on the links below to visit the next blog, which is the lovely Hannah's. Or if you're visiting backwards, you'll next find Ania's inspiring creation for this month.

Happy hopping and I hope to see you again soon!


Product List

Sunday, 12 June 2016

Simple Sundays is here!

Welcome to the first of my 'Simple Sundays' posts!

Each Sunday I'll be posting a simple project which can be made in just a few minutes, with minimal fuss.

Today's post is a simple birthday card:


The card base is in Whisper White cardstock cut to 8" x 6", scored at 4" on the long side and folded in half.
The DSP panel is from the NEW 'Playful Palette' DSP stack, cut to 5-3/4" x 3-3/4" and attached to the front of the card. The colours highlighted on this particular piece are 'Blushing Bride' and 'Sweet Sugarplum'.
The stamped panel is Whisper White cardstock cut to 3-1/2" x 3" and raised up using Stampin' Dimensionals.
The sentiment and flowers are stamped in NEW 'Sweet Sugarplum' ink using stamps from the 'Birthday Blooms' and the NEW 'Swirly Bird' stamp sets respectively.

Including cutting and scoring, this card takes around 5-10 minutes to make.

Hope you like it!

See you next week for another 'Simple Sunday'!


Product List