Saturday 30 January 2016

Simply Sketched Saturday Challenge


Thank you for joining us for another Simply Sketched Saturday Challenge! We’re so excited to be sharing this hop with you.  
The products used are all available in the current Annual, or seasonal, Stampin’ Up!® Catalogues*.  Simply use the buttons at the bottom of the post to keep hopping!


This week's sketch was designed by Cat Burchmore of Craft with Cat:


I decided to keep my card simple and pretty much to the template, but wanted to also make it bright and cheerful with a simple but cheerful sentiment.


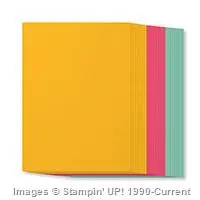
My card measures 7" x 5" (folded) and I used the melon mambo cardstock from the 'It's My Party' cardstock pack.
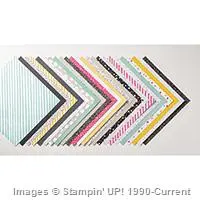
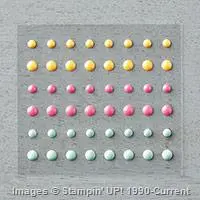
I then added a piece of Designer Series Paper from the 'It's My Party' DSP stack, measuring 6.5" x 4.5" - I think the coloured dots (melon mambo and crushed curry) compliment the cardstock perfectly.
I then cut out a circle (measuring 2.75" in diameter) from crushed curry cardstock and an oval (measuring 4.25" x 1.75") from melon mambo cardstock from the 'It's My Party' cardstock pack to layer on top of the DSP.
I stuck the crushed curry circle down flush, but raised the melon mambo oval up slightly using dimensionals, just to add exactly that - a wee bit of dimension!
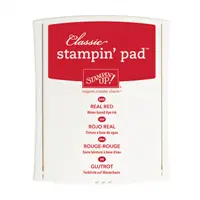
The 'hello' sentiment is stamped in Real Red ink using one of the stamps from the 'Hello' stamp set from the current Sale-A-Bration catalogue.


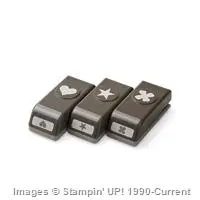
On the inside I added a piece of whisper white cardstock measuring 6" x 4" for writing the greeting, with a small heart punched out of the bottom corner using the itty bitty heart punch from the Itty Bitty Accents punch pack.
I like the contrast of the melon mambo card showing through.

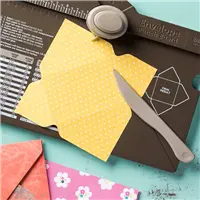
Of course, no card is complete without a matching envelope!


I made my envelope using my Envelope Punch Board, with a matching piece of DSP from the fabulous 'It's My Party' DSP stack.
My piece of paper measured 9.5" x 9.5".

And this is my completed project ready to write and pop in the post!


I hope you like it!
Thanks for visiting!


Wednesday 27 January 2016

Square Birthday Box


Today's project is a birthday box to match its little brother (or sister!) in last week's post.
It measures 2.1/2" x 2.1/2" x 2.1/2" and has plenty room inside for treats or small gifts.


Made with cardstock in Mint Macaron and decorated with DSP from the amazing 'It's My Party' range in the current Spring / Summer Stampin' Up! catalogue (see details at the bottom of this post).
The tag is punched in Mint Macaron cardstock using the label bracket punch, with a piece of Whisper White cardstock stamped with the tiny candles from the Age Awareness photopolymer stamp set in Mint Macaron ink and punched with the 1" circle punch.
The bling for this box is some 'It's My Party' enamel dots and a few basic rhinestones.


Cardstock size required to make this box is 10.1/2" x 8.1/2"

Score on long side at 1/2", 3", 5.1/2" and 8"
Score on short side at 1/2", 3" and 5.1/2".

Fold and burnish all score lines and make up as per last week's template - the difference will be that the middle sections will be larger.
On this box, I didn't cut the inner flaps on the top (which fold over underneath the lid), but this is down to your own personal preference. 

You will need five pieces of DSP in your chosen design, each measuring 2.1/4" square, to decorate the lid and the four sides of your box.
If your DSP has a pattern which lies in a specific direction, remember to make sure it's true (i.e. facing in the right direction) on each side and on the lid when looking at it from the front.

Add embellishments / tags as you wish.


Products used to make this project:

Wednesday 20 January 2016

Bath Bomb Box


A slight hint of Scotland in today's project!
A box to hold some small vegan bath bombs; and it holds quite a few!


The box is made with Very Vanilla cardstock, with the side panels and lid being decorated with one of the Merry Moments designer series papers. It's a particular favourite of mine!
The butterfly is cut from Very Vanillla cardstock using the Elegant Butterfly punch with three Rhinestone Basic Jewels to add a bit of bling!
The corners on the closing flap on the lid were rounded using the Project Life Corner Punch.


Measurements for this box are as follows:

Finished box dimensions are 2.3/4" x 2.3/4" x 1.1/2".

Cardstock required for box measures 11.3/4" x 7.5/8"

Score on long side at 2.3/4", 5.1/2", 8.1/4" and 11".

Turn cardstock anti-clockwise on scoring board and score on short side at 2.3/4", 4.1/4" and 7".

Fold and burnish all score lines.

Cut as per template below:


The squares to the bottom of the picture will form the base of your box. Cut straight up these, but feel free to notch ever so slightly to remove the score lines.
The shorter panels on the top will form the inside flaps on the top of your box. If you want to make sure these are even, measure at the half-way mark then score them slightly using your bone folder and cut along the score line.
The tab to the left of the picture is the tab by which you will close your box - I recommend using a strong adhesive such as Fast Fuse (which is what I used here), Tombow (allow a couple of minutes for this glue to dry) or Tear & Tape (double-sided tape).
Round the corners on the lid to help your box to close slightly easier.
You could also use a round or an oval punch to make a slight notch on the front panel to allow for easier opening, but on this box I decided no to do that and it still opens easily.

To decorate with DSP, you will need the following:

One piece measuring 2.1/2" x 2.1/2" for the top
Four pieces measuring 1.1/4" x 2.1/2" for the sides.

You can use a lesser adhesive such as Snail to apply these if you wish.
It's easier to apply these before you put your box together - remember to keep your pattern true when cutting and sticking these panels!

Then, all that remains is for you to fill your box with your chosen goodies - mine is vegan bath bombs!


Products used in this project:

Built for Free Using: My Stampin Blog